|
Disclaimer: If you use this process to recopper you armatures I am not responsible for any loss or harm this process can cause you. You use this on you own risk. Please don’t contact me if you loose a armature due to this process. Intro: This how-to will give you the possibility to recopper you armature using electrolysis.
You can find more technical information on this here: Purification of copper -> BBC electrolysis ELECTROLYSIS -> Electrolysis Before you start read the above information to give more technical background on this process work. I have been using electrolysis for about two years with great results. I will be placing this how to in 4 parts. Part1 -> How to prepare Copper sulphate solution.
Part 2 -> Prepare the armature
Part 3 -> The process electrolysis
Part 4 -> Complete armature
Part 1
Here is list of materials you to have before you start. 1 lt. distilled water
200 - 230 gr. Copper sulphate 
30 ml. sulfuric acid' 84%
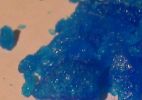
You can find the Copper sulphate normally in agriculture centers as it gets used for agriculture. It has a form of blue crystals (see picture). The sulfuric acid you should be able to find in electrical shops as it gets used for lead batteries. If you can not find the 84% don’t worry. Just add more sulfuric acid until you get the right percent.  Get yourself a plastic or glass bottle that can hold about 2 liters and mix the 1lt. distilled water with the 30ml sulfuric acid. Add more sulfuric acid if you don’t have 84% utill you have about 84 %. Now add the 200 – 230 gr. Copper sulphate (crystals) with the mix of distilled water and sulfuric acid. Now you will need to leave mixture for a couple day so that the Copper sulphate dissolves. You will end up with a blue liquid(see picture). Now you have you Copper sulphate solution which we will use in Part 3. Now you need to get yourself a 2 Volt battery.  
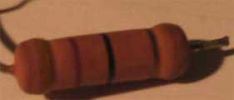
I am using a old glow plug battery (see picture) that has 2 Volt and 5 amps. Get some copper wire and copper junction tubing. You can find the copper junction tubing in any hardware store as it gets used for water tubes in your house. I have found that these tubes are almost pure copper and leave very little anode slime in the Copper sulphate solution during the process. You could use any other type copper. Now the 2 Volt will be to much and will not deposit the copper correctly to the com. Now you need to get a resistor to lower the voltage of the battery to about 0.2 - 05 volt. If found that 0,27 – 0,37 gives the best result. Now we are going to test the Copper sulphate solution. Get yourself a square plastic container (Tupperware) 
in fill it with your Copper sulphate solution for about 2 cm. from the bottom. Now get two pieces of copper tube and connect the plus (+) of the battery to one of the copper tubes. On the negative side you place your resistor between the battery and the copper tube. Insert the two copper tubes in the solution. Each one of the extreme of the plastic container. Now check the voltage between the polls. If the voltage is to high you will see on the copper cathode bubbles coming from it. If you this remove the cathode from the solution. Be careful not touch the solution with you hands. Use gloves to protect yourself and you surroundings as the acid will burn holes in everything. Make sure the voltage has the right amount. If the voltage is correct but you still see bubbles coming from the cathode add more sulfuric acid to the solution. Normally a few drops does the trick. Once you have done this add the cathode back in the solution and try again. If the bubbles have disappeared you can leave it for about a hour and check to see if the growth on the cathode hs increased. The growth should be about 0,05 – 0,1 every hour. I prefer to have slow increase as the end result is much smoother which gives work afterwards. This is the end of part one. (pictures will follow)
|